I Started a Successful Podcast with Just $250 and You Can Too
The No-Nonsense Guide on how you can be broke, dumb, and still have a podcast with over 10,000 downloads.
Everyone these days has a podcast — your best friend, your co-worker, almost everyone on The Bachelor, and even your grocer. They can’t all be that much more interesting than you! After all, you’re you!
The best part about podcasting is that you don’t have to be the most interesting person on the planet to start one. Anyone can podcast. In fact, besides a standard smartphone and free basic audio editing software, all you really need is to have something to say.
Step 1: Find Something to Say (Total Cost: $0)
With the podcasting boom upon us, there is a podcast about virtually everything from sneakers, to hilarious insights into the world of the Bachelor franchise, to mental health (see: Avocado Toast for the Soul).
You can choose from an topic imaginable with these small caveats:
- Make sure you are passionate about the topic. This is something that is fun for you that you may be keeping up with or researching anyway. The last thing you want to do is create a podcast about a topic that is mildly interesting just because “no one has done it before.”
- Make sure you have the resources and the breath of topic to continue the podcast for 2 seasons or 20 episodes. Unlike other guides, I’m not advocating that you spend time mapping out your first 20 episodes. However, I suggest taking a good hard look into your topic to see if you have the resources, the potential guests in your current network, and if your topic even warrants 20 episodes. For instance, if you start a podcast about the Kardashians — it would certainly help if you worked in entertainment and/or had access to celebrity guests. Also, you don’t want to get 4 episodes in to a specific cold case discussion podcast and find you have nothing else to talk about.
- Plan ahead and think evergreen content — people will listen to your podcast days, months, and even years after it is first released.
- (Optional) It really helps if your podcast is easily broken down into two of Apple Podcast’s existing categories. Apple Podcast is the most popular source for podcasts right now and having a defined category makes it easier for potential listeners to find your podcast. Find a list of the categories here.
Step 2: Write it Down (Total Cost: $0)
Remember when I said you could get away without obsessively planning your first 20 episodes? That isn’t the case for your first episode. Sorry.
First things first, write an introduction that welcomes your followers, tells them what they are listening to, why they are listening to it, and what episode they are on. This could be a script, a fleshed out outline, or a combination of the two. Here’s the exact outline I used for my first ever podcast episode of Fastpass to the Past: The Theme Park History Podcast.
Opening:
– Welcome to Fastpass to the Past. The Theme Park History Podcast.
– Have you ever wondered what is the origin story behind your favorite
attractions? Or where those abandoned tracks came from in Tomarrowland?
Or maybe, how did this whole theme park thing even get started? Well, you’re in the right place.
– Introduce Yourself: Hello I’m your host, Austin Carroll. — I am a history nerd. — A former Disneyland Guest Relations Hostess- sometimes affectionally or not
affectionally referred to as a plaid — and a Universal Studios Hollywood and Disneyland Annual Passholder. — I guess you could say I kinda love theme parks.
Episode Introduction
– Thanks for listening to my first ever episode.
– The ‘This week we’ll be discussing’ episode introduction. (Add hook)
I’ve more or less kept the same basic outline for all my episodes since. It didn’t take me long to write, but it really helps the listener determine within the first two mins if this is something they want to dedicate 30+ mins to listen too.
It’s not a bad idea to write a full-fledged script, or at least a detailed outline, for the rest of your first podcast episode. If you have guests on your podcast, a detailed list of interview questions and an intro/conclusion will likely be enough. I am not ashamed to admit that every episode of Fastpass is completely scripted. You just need to find what works best for you as a host.
In terms of a closing, here is my basic closing outline format (feel free to steal):
The ‘Thanks for listening’ close. I hope you enjoyed our podcast episode and learning more about _______.
Email me at _________ if you have show ideas, disagree with
anything I said, or just want to say hi. I love that. You can also message on
Facebook — if that’s easier. I love to read some of these responses on air.
Where they can find the Show notes (your website)
The ‘Please leave an iTunes review’ if you enjoyed the podcast and want to learn more
Looking for a detailed step by step guide to writing podcast scripts, check out the CDC Audio Script Writing Guide.
Step 3: Purchase Equipment (Total Cost: $100–$250)
There is a reason this is step three. Many future podcasters get so excited by the prospect of recording their podcast they rush out to Best Buy or Amazon.com and load their cart with tons of expensive equipment to make their podcast dreams come true. Unfortunately, many of these podcasts never even get made (life happens) and the audio equipment is neglected to a garage sale.
That’s why you should really have an idea and a script BEFORE you buy one thing for your podcast. I would say that equipment is potentially the least important piece of the podcast pie when you are first starting out. With a decent smartphone, you can even make “down and dirty” podcasts with your phone (using the Anchor app or the voice memos). Spoiler: They don’t sound that bad.
However, if you are interested in creating a professional-sounding podcast you have a couple of pricing options in terms of equipment.
The Basics (Under $100)
This is the perfect tier for those that don’t have a lot of money lying around to invest in their passion podcast. It is also a great option for people looking to record as a group (2+) since buying individual nicer equipment can get real pricy… fast.
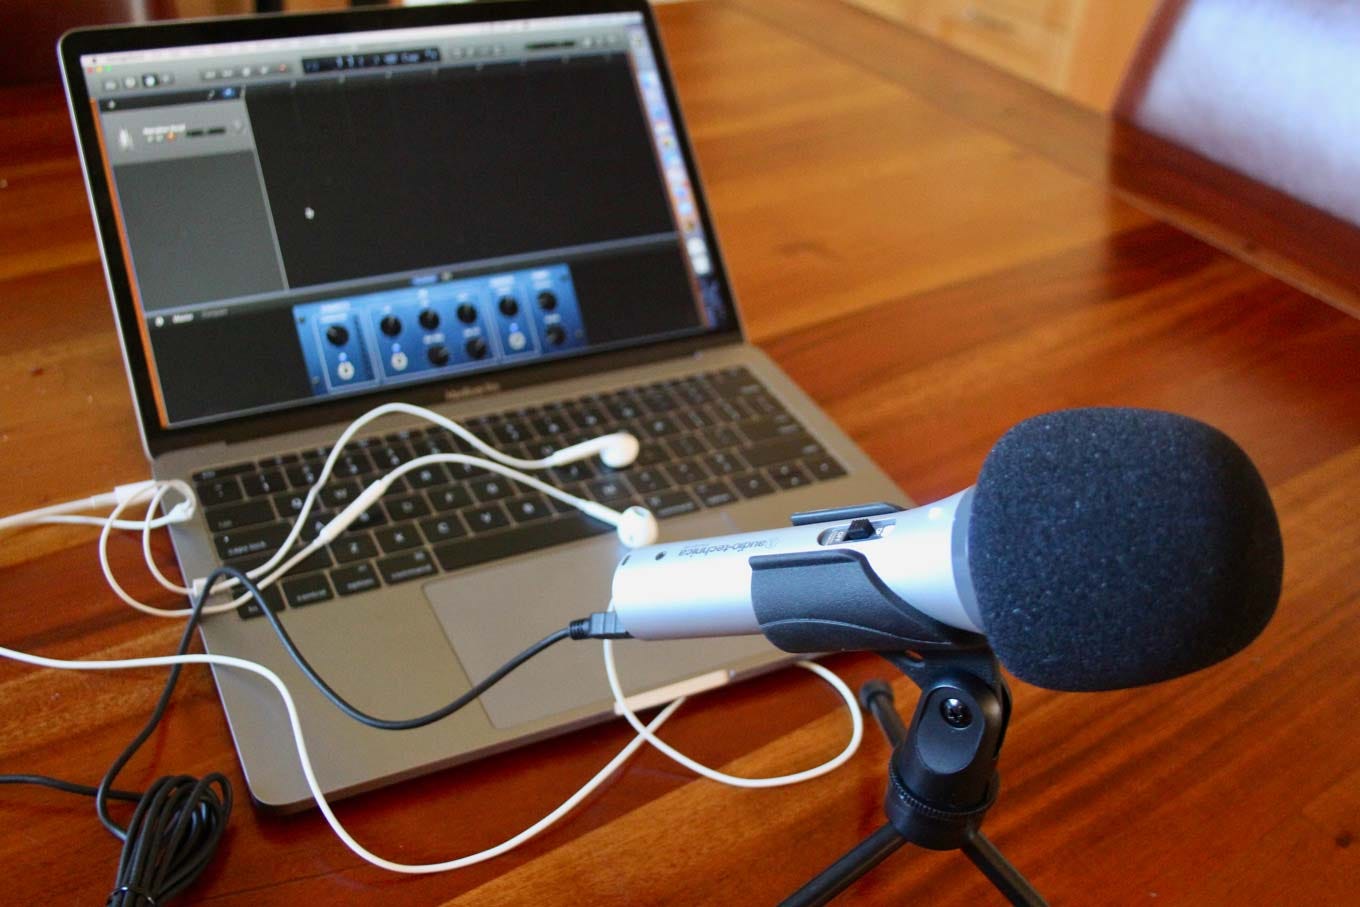
Microphone(s)*: Audio-Technica ATR2100-USB Cardioid Dynamic USB/XLR Microphone ($64.00)
- This microphone is great because it delivers exceptional sound-quality for a low cost. It is very durable, doesn’t pick up a lot of background sounds, and comes with a desktop stand. It also can be easily plugged into any computer with USB ports — which allows you to record/edit directly in Garage Band or Audacity when you record. It also can be grown up as it includes a XLR microphone for when you upgrade your kit to include a sound mixer or start facilitating on-location segments.
*Make sure you buy a microphone for every person that will be recorded. For instance, if you have two constant hosts and one guest recorded in studio for every episode — you MUST buy three microphones. Sharing isn’t caring when you’re podcasting.
Pop Filter(s): Neewer NW(B-3) 6 inch Studio Microphone Mic Round Shape Wind Pop Filter Mask Shield with Stand Clip ($7.99)
Headphones: Sony MDR 7506 ($79.99)
- I would discourage people from using their Apple Earbuds to edit and record their podcast episodes as you really do miss things. However, if you want to save the money — this is the easiest place to save it.
Software: Download Audacity for Windows ($0.00), Garage Band for Macs ($0.00)
Next purchase up, you should also probably buy a $11 shock mount to replace the basic microphone clip that comes with the ATR2100. If your microphone is sitting on a desk or table, your slight movements will reverberate right up through the mic stand and sound terrible in your recording. A shock mount basically isolates the microphone so that it floats on elastic bands.
The Content Creator- Ideal for Solo Hosts (Under $250)
Microphone(s)*: The Blue Yeti ($129 — I paid $116)
- This microphone is very much the digital industry standard for YouTubers, Podcasters, and the like. Like the Audio-Technica ATR2100, the Blue Yeti can be easily plugged into any computer with USB ports, which allows you to record/edit directly in Garage Band or Audacity. However, it does not have an XLR connection so it is only ideal for studio work. It also has a built in stand and delivers amazing sound quality.
Pop Filter(s): Premium 6-inch Pop Filter For Blue Yeti Microphone by Auphonix ($19 — I paid $15)
Headphones: Audio Technica ATH-M40x ($99)
- You could also upgrade to Audio-Technica ATH-M50x ($149).
- Note: I had won pretty decent headphones a couple years back, so I didn’t buy any headphones when I first started podcasting. (I paid $0).
Step 4: Record Your First Episode (Total Cost: $0)
You can record for free via Garage Band (Mac) or Audacity (Windows). Find a quiet space — away from an fridges, dishwashers, or air-conditioning units. Also, be sure to monitor by plugging your headphones directly into your microphone.
Hint: I would recommend recording 2–3 episodes in a row when you first start out. It is easier to build an audience if you start out by releasing 2–3 episodes on iTunes.
After you record, go back through and clean up sections like ums, likes, and strange sounds in the background. With a USB-microphone, you can even re-record over certain parts that you stumbled on. However, don’t go too crazy! You don’t need to edit out every “um” you ever uttered. Ideally, you’ll only spend about 20–60 mins editing your episodes.
Don’t want to edit? Luckily, Fiverr exists. For the low low cost of $5–15 per episode, you can have someone edit your podcast for you. Check it out.
Step 5: Source a Theme Song (Total Cost: $15–$50)
Ready for the fun part? Every great podcast has a great piece of custom intro music or even a third-party introduction. Think this may cost a bundle? Think again — enter Fiverr.
I used this wonderful composer to compose 30-seconds for my podcast introduction. Although I only paid $15, his basic composition currently costs $50. However, it is well worth it. I would even go so far to say that a decent music bed can even make a podcast recorded on a iPhone sound professional.
Looking for a third-party audio introduction instead? You can find talented audio talent on Fiverr as well.
Step 6: Create Eye-Catching Podcast Artwork (Total Cost: $0–$250)
Don’t have a graphic design bone in your body? That’s okay! Turns out, it’s not a requirement to host a podcast. 😉
Free Options
You can create a pretty nice graphic (3000 pixels square) on Canva.com — a free in-browser graphic design program that includes 100’s of square templates. Just drag and drop!
Tips for using Canva:
- Need free trendy stock photography? Use Unsplash.com.
- To see relevant templates: Create a design -> CD Cover
Paid Options
You can always pay a traditional graphic designer (or friend) to put together an eye-catching podcast graphic for your podcast. Or, you could find someone on Fiverr.com who specializes in Album Art/Podcast Art.
These costs can range significantly from $10 to $250 depending upon experience, reviews, and required turn around. Many artists will also provide packages with matching social media graphics for your podcast-related Instagram, Twitter, and Facebook pages. There is certainly a solution for every budget.
Graphic Designers on Fiverr:
- $5 Podcast Cover Art by riad990
- $15 Podcast Cover Art by duousmedia
- $20 Podcast Cover Art by lissa1
- $50 Podcast Cover Art by alexenia
- $100-120 Podcast Cover Art by tombiesinger
- $150–250 Podcast Cover Art by xqggqx *This is the designer I used for Fastpass to the Past. However, when I used his services, he was priced at $75.00.
Step 7: Figure Out Hosting (Total Cost: $0 – $20)
This is perhaps the biggest barrier to entry in terms of podcasting. There is a lot of conflicting information on the internet and a wealth of options available at all different skill levels and price points. In the vein of keeping it simple stupid, I am just going to recommend two platforms (and two of their alternatives) that are ideal for beginners. What are we waiting for? Let’s get you set up with a RSS Feed.
The first step is deciding one very important consideration: Do I want my podcast to have a website?
There are a few reasons this is important.
- 1) Cost — Although some Podcast hosts do provide a website, they tend to be more expensive. There is also the additional cost of a custom domain name, which needs to be paid annually (around $15 a year). Podcast hosts that don’t include a website are more common and tend to be cheaper.
- 2) Ease of Promotion — It is easier to promote a podcast online/social media if you have a website with listening pages for each of the episodes v.s. linking to a podcast provider (Apple Podcasts, etc.). That’s just a fact. However, it is not a make or break.
- 3) Show Notes — If you plan on referencing show notes (links to topics, news articles, sources), you need a website.
- 4) Sponsors/ Guests — If you plan on eventually sourcing sponsors or influential guests, you will need a website to entice them with greater visibility.
- 5) SEO — Yes, the infamous “SEO.” This is a whole other topic, but all you need to know is that if you have a website there is a much greater chance of your podcast being found by potential sponsors, media partners, and listeners.
Now, time to decide…
I don’t need a website! (Cost: $0–5 monthly)
Sweet! This is going to be easy. Get ready to have your podcast up and running in no time at all using Pinecast.
Pinecast is perhaps one of the simplest podcast hosts out there and it has a price that cannot be beat. You can use Pinecast for free forever. Or, to unlock more features, you can upgrade to the $5 a month plan.
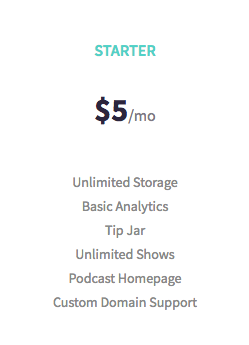
This is an incredible value given its easy-to-use interface. But… there are some tradeoffs. The platform hosts your podcast files and generates an RSS feed for you (the key to getting on Apple Podcasts, etc.).
However, the platform won’t submit feeds for you to podcast distributors. It also does not provide a good looking website- although some podcasters do choose to use the auto-generated “podcast homepage.” The analytics are also pretty basic — centering on listeners and subscribers v.s. fun stuff like geographic & by-platform data available elsewhere. However, if you are just getting started, it is a low-cost or free alternative to non-podcast friendly hosts like Soundcloud and the like.
Not sold on Pinecast? Podbean allows 100mb or about two episodes a month for just $3. You can also upgrade to unlimited uploads for $9 monthly. Podbean also offers additional features as part of its monthly packages (like an Advertising Marketplace), most of which won’t be of any use to you just yet.
I want a website! (Cost: $19 monthly + domain name)
Great! Congratulations on taking the first step to having a successful podcast — admitting that you need a website.
Currently, I use Fireside as my podcast host for Fastpass to the Past. The price is $19 a month, but it is worth every penny. It is chock-full of features you didn’t even know you needed. Not only do you get a beautiful responsive website with individual pages and social media players for each episode, you can create a page for each of your guests, sponsors, hosts. You can add collaborators to manage your podcast. Or… even add a blog! Perhaps the best tool is their bookmarking tool that allows you to create “Show Notes” for a particular episode within your browser in just seconds. It’s crazy.
Here’s an example of what Fastpass to the Past’s Fireside site looks like: http://www.themeparkhistorypodcast.com/
”With Fireside we were able to get our first podcast up and running in minutes! Fireside has everything we ever wanted: easy publishing, beautiful reports, and an amazing team always eager to help out.“ — James Montemagno
Use promo code ITSYOURSHOW to get a 20% Discount on Fireside hosting for 3 Months! *Note: Not my promo code, just want to save you some $$$.
I used a promo code when I started and my first month on Fireside was $15. I also purchased a domain name from GoDaddy.com for $10.95, also with a promo code.
Don’t want to spend $19 a month on Fireside? Simplecast offers a comparable service (without all of the special features) for $12 monthly. Here’s an example of one of their websites.
Step 8: The Finishing Touches — Titles, Descriptions, & SEO (Total Cost: $0)
Now, get ready to spend even more time crafting the perfect podcast description, episode description, and episode title. These pieces of information are incredibly important in terms of “SEO,” which for our purposes basically means that you should think about what your desired listeners are going to type in to Apple Podcasts or Spotify. For instance, when I started Fastpass to the Past, I wanted to reach listeners that had an interest in Disney, Universal, Theme Parks, and History.
Once I defined those “keywords,” I actually changed the name of my podcast title from merely “Fastpass to the Past” to “Fastpass to the Past: The Theme Park History Podcast.” This basically ensures that my podcast will ALWAYS appear when someone searches for “theme park history.” The title of your podcast is your most valuable search tool, don’t be afraid to use it.
Secondly, your podcast description is a great place to include those keywords. Here is Fastpass to the Past’s current podcast description. I have gone ahead and bolded the key words I incorporated into the description.
Join Austin, a former Disneyland Cast Member, as she takes you through the outrageous and sometimes downright strange origin stories of your favorite theme parks, attractions, and shows. The outlandish history of Disneyland, Disney World, Universal Studios, Knott’s Berry Farms, and much more will be explored along with some outrageous stories from former Employees & Cast Members. What are you waiting for? For your safety, remain seated with your hands, arms, feet, and legs inside the podcast at all times.
Many podcasters also use their “Author” byline to include SEO-keywords like Marketer, Inspirational Speaker, Historian, etc. However, I don’t think the potential SEO benefit is worth the clutter on your podcast page. I would just use your the names of your hosts or your company title.
Guess what? The same things we discussed above apply to each of your episodes. Episode titles and episode descriptions are also very important for SEO. You can see some examples of how I created searchable titles for my podcast below:

Here’s a great article that goes more in depth on all the ways to optimize your podcast for those pesky search engines.
Step 9: Submit to Podcasting Directories
Congratulations! By now you should have a functioning podcast RSS feed with 1–3 episodes published, a hosting platform, stunning graphics, a badass podcast title, and a SEO-optimized description. See… that wasn’t so hard.
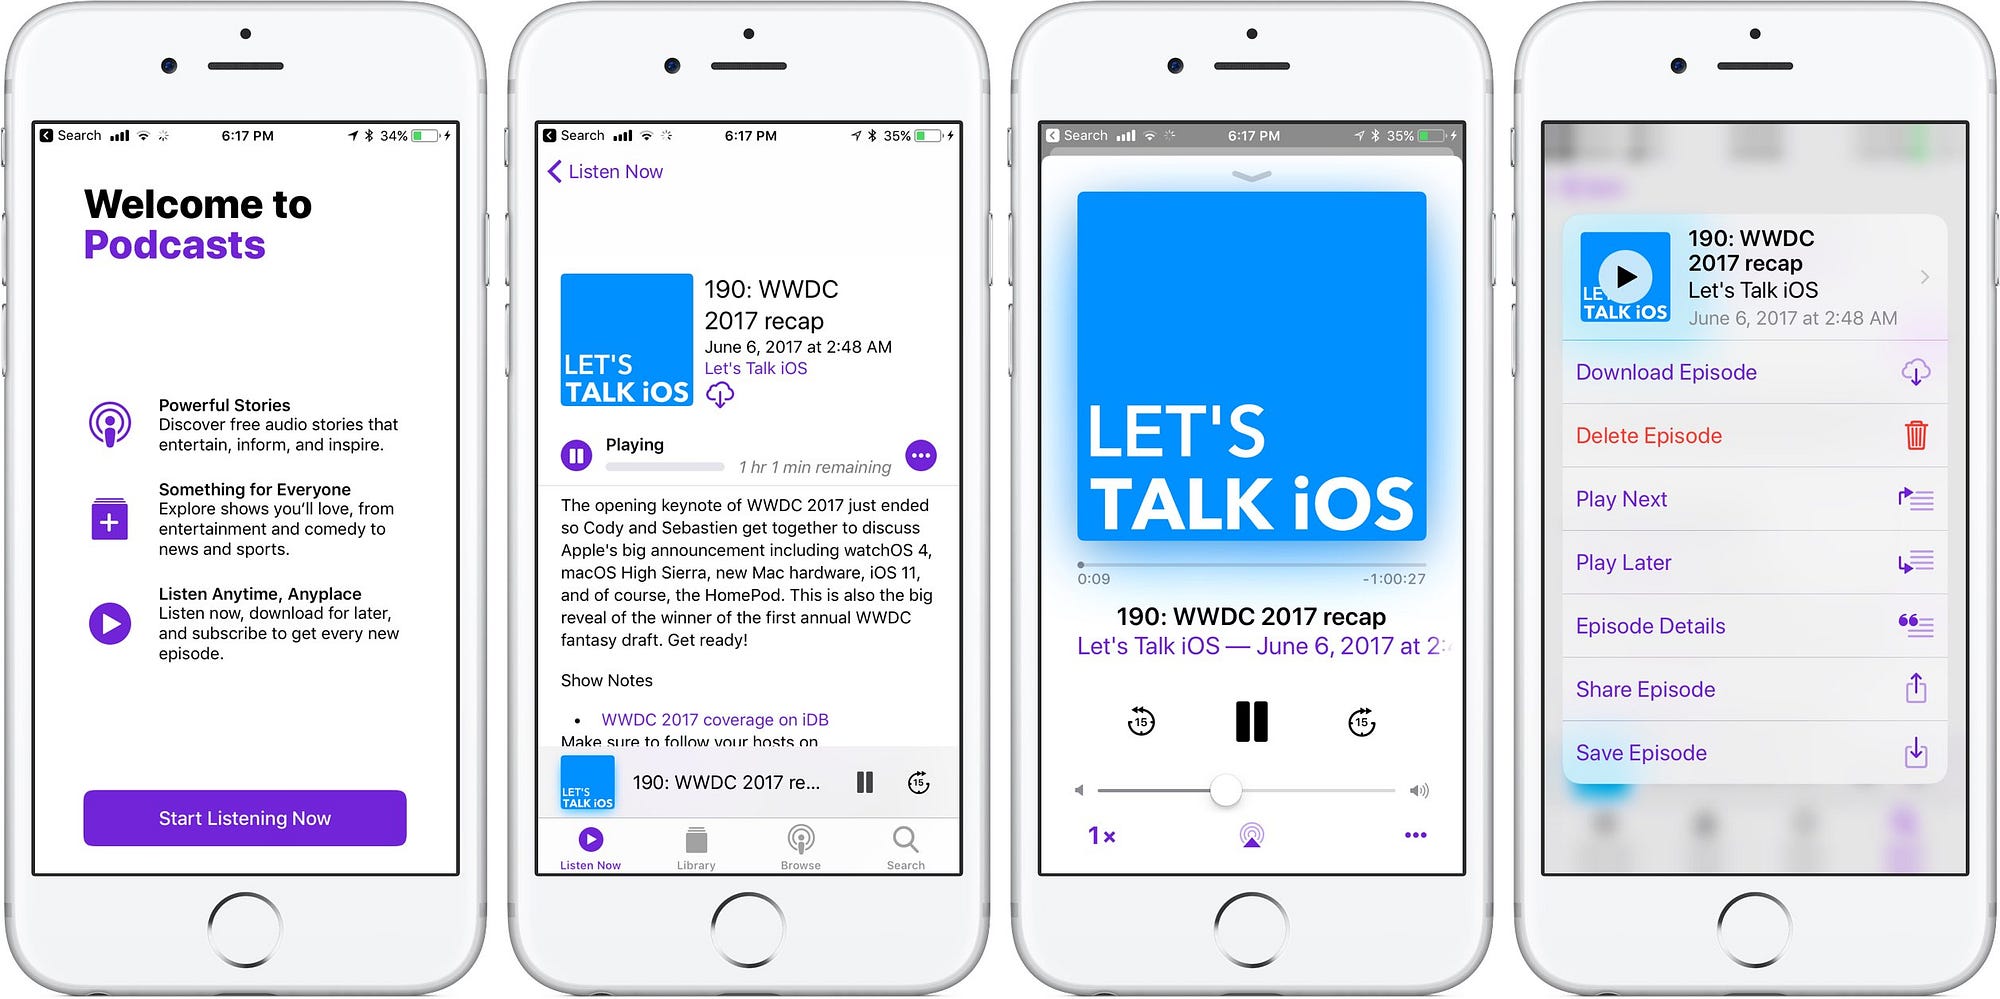
Now it’s time for the exciting bit! Let’s get your podcast on Apple Podcasts — by far the most used platform in podcast discovery.
Note: Some podcast hosts will submit your podcast for you or have an easy one-click button to do so. Make sure you reach out and ask so you don’t have to do more work then you need to.
First, validate your podcast. Find your RSS feed URL on your podcast host, copy, and paste into this website (Podbase).
Secondly, submit to Apple Podcasts. Here’s a step-by-step guide from Apple explaining how to do this.
After Apple Podcasts, I would recommend submitting your podcast to the following platforms:
- Google Play — Here’s how.
- Stitcher — Here’s how.
You can also submit your podcast to other providers, including iHeartRadio (after 3 months) and Spotify. Note: Spotify is currently having a problem with their backend and will be integrating new podcasts to their directory in mid-June.
Here’s a list of all the current podcast directories.
Step 10: Spread the Word (Total Cost: $0)
Once you get approved (usually less than a week), you officially have a podcast!
However, the work is not done! You have to let people know you have a podcast. If you don’t have time to generate an official marketing plan, that’s completely fine. Simply share your podcast in the following places and you will likely start generating a following:
- Personal Facebook — Your Great Aunt Karen would love to listen to your podcast, I’m sure.
- Personal LinkedIn —Your LinkedIn network is a great place to find potential listeners for your podcast especially if it has to do with a hobby, professional development, or includes notable guests.
- Facebook Groups — Sharing your podcast episodes in relevant Facebook groups is a wonderful way to spread the word and gain subscribers. For instance, if a Fastpass to the Past episode deals with Disneyland History, I always share to the Vintage Disneyland Facebook groups.
- Email — Don’t be afraid of emailing friends, family, or co-workers when you release a new episode if you know they may be interested in the topic. Word of mouth is an amazing way to grow subscribers. If you already have an email list for your business, you have no excuse!
My Final Costs:
Equipment: $131
Blue Yeti Microphone — $116
Pop Filter — $15
Headphones — $0
Recording/Editing: $0
Theme Song: $15
Graphic Design: $75
Podcast Hosting: $25.95 (First Month)
Fireside Monthly Fee: $15 each for the first 3 months, $19 onward
Domain Name from GoDaddy.com: $10.95 annually
TOTAL START UP COST: $246.95
By Austin Carrol, https://medium.com/